Back to Index Page

OPC Data Acquisition

Genesis OPC Explorer 3.1


About Genesis OPC Explorer 3.1
IDE:MS Visual Studio 2017
Appl. Size:11.8 MB (12.386.304)
Creation Date:20-Oct-‎2018 18:09:18
Installer Size:6.70 MB (7.025.823 bytes)
Installer Date‎20-Oct-‎2018 18:43:37

animated-download-sign-and-icon-image-0019
Animated Icon from animatedimages.org


Genesis OPC Explorer 3.1 Menu

Genesis OPC Explorer 3.1

Fast Track
What's New in Release 3.0
Feedback and Awards
Download Counters
Download Genesis OPC Explorer 3.1
Safe Use of Genesis OPC Explorer 3.1
Genesis History

Genesis OPC Explorer Setup

Select OPC Server
Manage OPC Groups
Manage Acquired OPC Items
Manage Calculated OPC Items
Load OPC Project
Save OPC Project
Close OPC Project

Data Acquisition and Storage

Start Data Acquisition
Resume Data Acquisition
Stop Data Acquisition
Display Performance Data
Acquisition Data Matrix

OPC Data Listing

Display of OPC Data Listing
Export OPC Data
Export to Clipboard
Toggle Performance Display
Configure Types Color

OPC Data Charting

Display of OPC Data Chart
Set Chart Series Colour
Set Chart Title Options
Manipulate Chart Display
Set Series Selection
Set Chart Axis
Set Chart Legends
Save Chart Image as File
Save Chart Image to Clipboard
Enable Cursor Data
Toggle Server Data Display

Registration and Support

Register Genesis OPC Explorer 3.1
Support of Genesis OPC Explorer 3.1
Register Support of Genesis OPC Explorer 3.1


Thanks for bringing support to TGMDev
through PayPal Donations...


      Addition, Modification and Removal of OPC Group

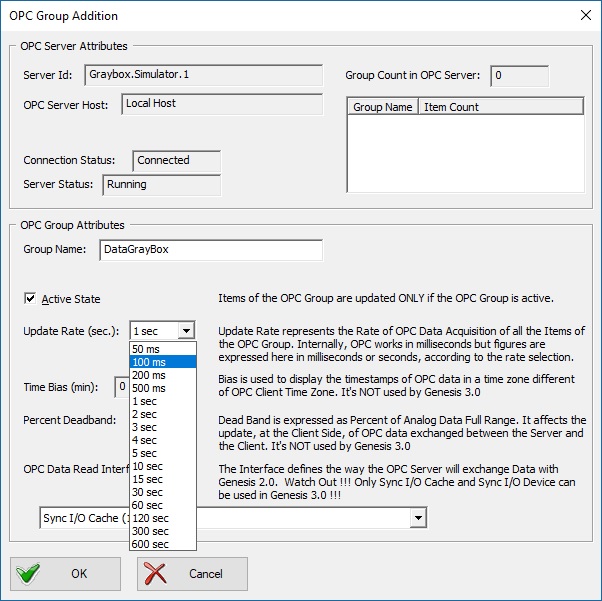
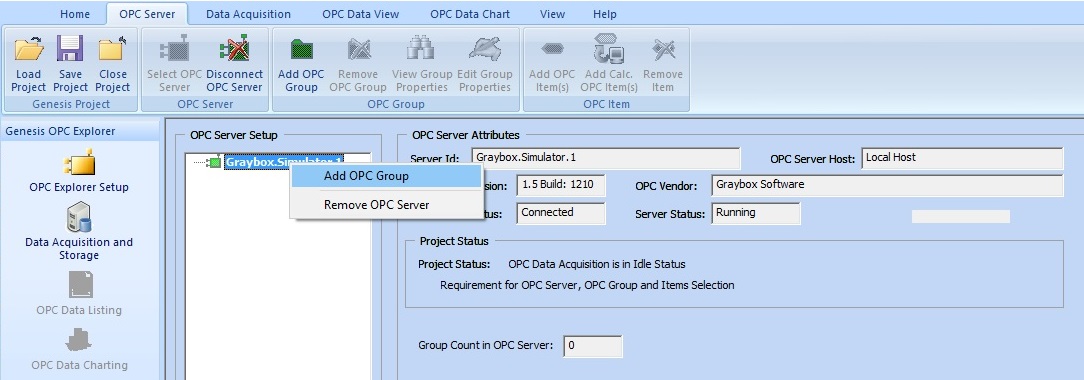
Adding an OPC Group requires beforehand the selection of an OPC Server. (click here to get details on selection of an OPC Server)

1. Addition of OPC Group

After OPC Server Selection, the second step is the creation of OPC Group(s). As the OPC Server is the container of the OPC groups, the OPC Groups are containers of OPC Items.
The OPC Group is only a way to organize the OPC Items and maintains common attributes of contained OPC items, such as the update rate.

Two methods are available to start the OPC Group Addition:
  • Click on the Ribbon Button 'Add OPC Group' in the Ribbon Tab 'OPC Server'


  • Right-Click the OPC Server in the 'OPC Server Setup' Tree Control and Select the menu 'Add OPC Group'

  • Addition of the OPC Group


  • Check the default attributes of the OPC Group to be added.

    Addition of the OPC Group 'DataGrayBox' with Update Rate = 100 ms


  • Change the attributes to fit your requirements:
    1. Group Name
    2. By Default, the OPC Group are automatically named as 'GroupXX' where XX is a sequential number starting at 01.
      You can either left the name proposed by default or edit the OPC Group Name.

    3. Active State
    4. This is added to fit the requirements of the OPC Foundations. Leave it selected. Otherwise, the OPC Group won't be processed and will be useless...

    5. Update Rate
    6. By Default, the update rate is set to 1 second (internally as 1000 milliseconds).
      Click the DropDown Menu to select a different rate from 50 milliseconds to 600 seconds

    7. OPC Data Read Interface
    8. Genesis OPC Explorer 3.1 provides four different modes, ONLY THE TWO FIRST BEEING IMPLEMENTED:
      • Synchronous I/O Cache (1.0a): this is the default interface
      • Synchronous I/O Device (1.0a): this choice will trigger a confirmation message box, as it may freeze OPC operations
      • Asynchronous I/O (1.0a): this interface is not implemented in Genesis OPC Explorer 3.1. Do NOT select it in this release.
      • Asynchronous I/O (2.0): this interface is not implemented in Genesis OPC Explorer 3.1. Do NOT select it in this release.


  • Confirm OPC Group attributes by clicking on the 'Ok' button.

2. Modification of OPC Group

Two methods are available to modify an existing OPC Group:
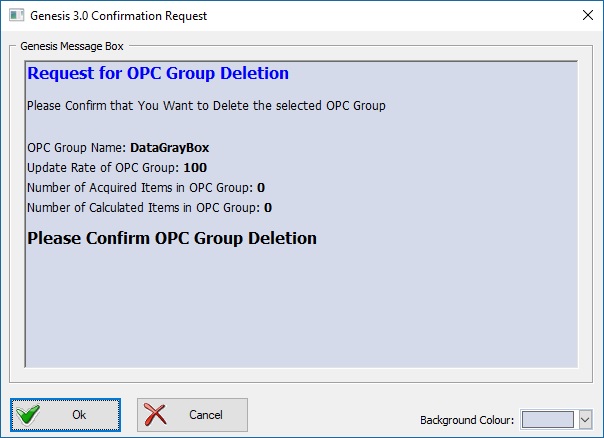
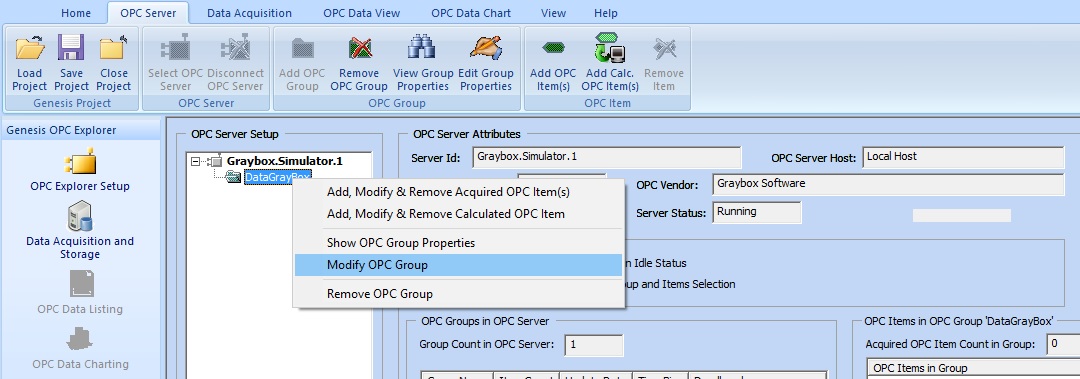
  • Click on the Ribbon Button 'Edit Group Properties' in the Ribbon Tab 'OPC Server'


  • Right-Click the OPC Group to modify and Select the menu 'Modify OPC Group'

  • Modification of the OPC Group


  • Modify the OPC Group Properties (see 'Addition of OPC Group' for details about OPC Group Attributes)
  • Confirm with the 'Ok' button and the OPC Group attributes are updated according to the modified settings.

3. Removal of OPC Group

Two methods are available to start the OPC Group Removal
  • Click on the Ribbon Button 'Remove OPC Group in the Ribbon Tab 'OPC Server'


  • Right-Click the OPC Group to delete and Select the menu 'Remove OPC Group'

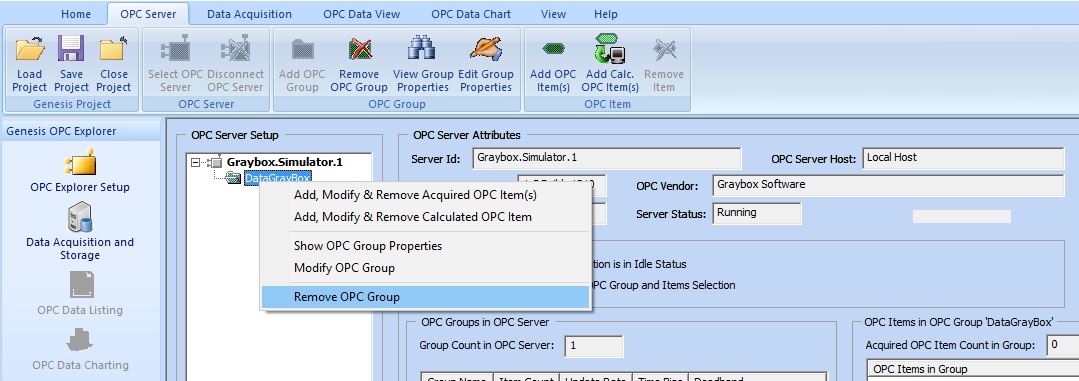
  • Removal of the OPC Group


  • Confirm with the 'Ok' button in the message box requesting for confirmation of OPC Group Removal.

    Request for OPC Group Removal


      Tell your Friends about Genesis OPC Explorer 3.1


Visitors Count: 32556